
One of the cheapest and easiest ways to update small spaces like a bathroom is with paint. You can paint the walls, sure, but why not paint mirror frames, fixtures, lights, towel holders, wall decor, and even doorknobs? These mirror painting ideas will help you refresh your room without breaking your budget.
What’s “in” can change pretty quickly – much quicker than your lights, doorknobs, or mirror frames break or stop working. Rather than wasting money on buying new and figuring out how to switch them out, you can easily update what you already have without breaking the bank.
Our bathroom needed a refresh but just wasn’t in the budget, since we’re focusing on the kitchen. So instead, we chose to go after some small and simple wins by choosing to renew pieces rather than replace them.
One of the pieces we focused on renewing was our large mirror over the sink. My husband hated the silver, heavy finish, and candidly, it was pretty dated and dark. Since there’s no large windows in the bathroom, keeping everything light and breezy was important. And since it’s a medicine cabinet, we couldn’t choose to remove the frame to make it a frameless mirror. So I came up with a pretty good alternative.
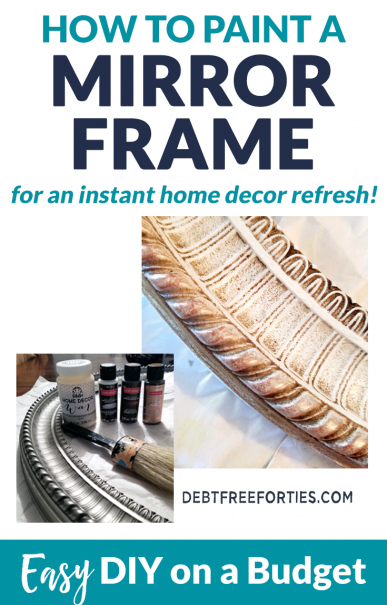
So with a couple of hours to kill and $20 burning a hole in my pocket, I set off to paint the mirror frame instead of buying a new round mirror (and tossing this one into the yard sale pile). This turned out to be one of my favorite easy diy projects because it was easy, cheap, and didn’t take long. The entire project took about two hours from start to finish, even without a super simple mirror frame.
wasn’t in the budget, since we’re focusing on the kitchen. So instead, we chose to go after some small and simple wins by choosing to renew pieces rather than replace them.
One of the pieces we focused on renewing was our large mirror over the sink. My husband hated the silver, heavy finish, and candidly, it was pretty dated.
So with a couple of hours to kill and $20 burning a hole in my pocket, I set off to try a few mirror painting ideas instead of buying a new mirror (and tossing this one into the yard sale pile).

How to Paint an Old Mirror Frame
What kind of paint do you use on a mirror?
There are a lot of different ways to try mirror painting ideas, and this is one of the smaller diy projects out there, so it’s perfect for trying something new. The best part is, if you don’t like the diy mirror frame ideas you’ve tried, you can just cover it over with another layer of paint, no harm done.
While I did a mix of chalk paint, acrylic craft paint, and wax in layers on my wall mirror frame, the good news is you can easily try something else. Some creative ideas include:
-
Chalk paint.
I love, love using chalk paint on mirror frames because they tend to have a lot of details and crevices. It makes it easy to layer colors, play with tinted wax, and build a layered look to your color palette. Plus, you don’t have to use a primer with chalk paint. It adheres great to wood, metal, and plastic frames.
-
Spray paint.
If you’re not looking for a lot of layered color or dimension, spray painting can work. You can get it textured, matte, metallic, hammered and even chalkboard. Plus, some spray paints have primer and paint in one, so you don’t always have to use a primer. Spray paint would work if your mirror frame is flat without a lot of crevices or detail work, and you can easily remove it from the wall.
-
Latex paint.
If you have a wall color that you love, you can use latex paint on your mirror frame. Make sure to use a foam roller to avoid brush strokes. I would only recommend this if your frame is relatively plain and doesn’t require a lot of brushwork. Also, you’ll need to use a primer to get solid coverage. If your mirror belongs in a bathroom or an area with high moisture, consider latex paint specifically for bathrooms.
-
Wood Stain.
If your mirror frame is wood, you can sand down the old stain (or paint) and restain it with a stain like this. Sanding, restaining, and sealing can be time-intensive but will produce a beautiful wood finish.
-
Milk paint.
This paint often comes in a powder that you mix to create your perfect hue. Since mirror frames are small, this could be an excellent opportunity to try out milk paint. It produces a more ‘chippy’ look and will distress more over time. Milk paint also ages over time, creating a sheen that gives it an authentic antique look.
-
Salt wash.
Salt wash is perfect if you want an aged and antiqued look. It creates a very textured surface that makes the piece look like it’s been sitting out in the sea air and sun for ages. Combining salt wash with any of the paints above creates a unique and beautiful piece!
-
Gold leaf/foil.
If you want to learn how to paint a mirror frame antique gold, try gold leaf. Once painted, you apply thin sheets of gold leaf to create a beautiful and luxurious finish. If you’re want to change a gold mirror frame to silver or bronze, they make silver and bronze leaf as well. The gold leaf look can also be acheived with paint without the work – I would recommend using something like this paint.
A good reason to use chalk paint is that you won’t have to sand the mirror before painting (which to me, is a fantastic idea because it means less work!). However, if you are using any other kind of paint, it’s suggested to sand first. This helps the paint stick to the surface better, as well as gives an overall smoother appearance.
What you will need to try out your mirror painting ideas:
To make my mirror painting ideas come to life, I used chalk paint since I knew I could create some beautiful textures and layers with the details of the frame. My frame is plastic, so I knew that chalk paint would be easier to use since I wouldn’t have to mess with a primer.
Supplies:
- Your latest thrift store find or vintage mirror
- Chalk Paint (this is your base/primary color, I chose this white)
- Various brushes (small are great for crevices, big for quick coverage; I had cheap ones like this sponge one and these brushes)
- Chalk paint wax (this is the tint that goes in the cracks, I used a dark one like this)
- Painter’s tape and cardboard (if leaving mirror in the frame)
- Screwdriver (if removing the mirror)
- Acrylic or metallic paints for dry brushing/highlights (optional)
- A drop cloth to paint on or lay below the mirror if you can’t remove it from the wall
How to protect a mirror when painting a frame
My mirror and frame are the door of a medicine cabinet. Luckily, I was able to use a screwdriver to dismantle the frame and remove it entirely from the door.
On the inside of the door were screws around the entire oval. I removed the screws from the top so that I could slide out the glass part of the mirror before removing the plastic frame. I then placed the mirror in a safe place (ekkk!), removed the rest of the screws, and popped off the mirror frame.
If your frame doesn’t come off, try removing the full door/mirror.
If you can’t remove the mirror from the frame, you’ll want to cut a piece of cardboard to place over the mirror area. Then, you’ll use painter’s tape to tape under the edge of the frame on the flat surfaces of the mirror, so that paint doesn’t end up it as you try out your favorite mirror painting ideas.
An alternative idea: Another interesting idea is to use vaseline, however, then you have to worry about it getting on the frame and preventing the paint from sticking well, especially since vaseline can be used to distress chalk paint. Plus, then you have to clean vaseline off your mirror, which seems like it could be a smeary pain in the butt.
Next, prep your mirror frame for painting.
No matter which mirror painting ideas you choose to try, it’s important to have a clean surface so that the finish looks great.
If you’re choosing to stain a wood frame, now is when you would use a sander or sandpaper to strip the wood down. Once the sanding is done, make sure to wipe the frame down with a damp cloth or a tack cloth to remove all the bits of dust. If you don’t, your paint job will be a bumpy, hot mess!
If you’re painting your frame (whether metal, wood, or plastic), wipe it down and clean it with a damp cloth or Magic Eraser. This removes any stray toothpaste chunks, dirt, or gunk that’s made its way onto the frame over the years.
Paint your base coat.
For the next step, I chose FolkArt’s White Adirondack and put down two light coats with a small sponge brush. Using a sponge kept the frame from having brushstrokes that would create a different texture than I wanted. This coat doesn’t have to be white, it can also be one of your base colors, it’s really up to you.
Here’s the mirror frame after one coat of chalk paint:

And after the second coat of chalk paint:

Now that I have my base down, I could do several things. I could add some wax (from a candle) or vaseline to create spots where I can show this bottom color through. I did that on this dresser, to show the blue through.
If I did a second chalk paint color, I could paint and wipe to show some of the base color. Or, I could let it dry and sand where I’ve added the vaseline/candle wax to create a chunkier removal of paint, as I did here.
However, for this project, I decided to just stick with one chalk paint for the mirror frame to keep it from being too heavy and dark.
Next, use wax to seal the frame.
Since we have rubbed oil bronze in our bathroom, I decided to pull some brown into the mirror frame. I did this by sealing the frame with dark wax.
You can see it best in the coils around the frame here:

Wax comes in various colors, including clear, white, brown, and even grey. It will give a beautiful tint to your piece. Remember that wax settles in the cracks and crevices of your frame, so that’s the color you’ll see in those areas.
To use the wax, brush it on over a small area with a round bristle brush. Then, use a clean white cloth to wipe it off.
Bonus Tip for Using Wax:
If the brown is too dark, you can mix your wax with clear wax before brushing it on. Or, if you’ve already brushed and wiped your brown wax off, you can brush on a clear wax over the top. Then, use the cloth to wipe and help pick up and remove some of the brown wax. Using the clear wax will help soften that heavier color.
Once you’re done with your wax layer, you want to let it dry overnight. Then you’re going to want to use a soft, white cloth to buff the wax to a dull shine.

Add some highlights to your frame.
You can choose to stop here, but since I was attempting to match the rubbed oil bronze look, I opted to do some dry brushing of highlights with a metallic finish.
Dry brushing is a method where you use very little paint to highlight spots of your frame. Start with a dry brush and dab the tip in the paint. Then, you’re going to use a paper towel to dab the brush onto to remove any excess paint.
You want to make sure the brush is dry and not saturated with paint. Once you have most of the color off, you’re going to hit the high parts of the frame to create a highlight with your accent color. I went through and did a round with a beautiful rose gold metallic paint:

And then the second dry brush was with a metallic bronze acrylic paint:

If you feel like it’s too much of a highlight, use a cloth to wipe off the excess. You just want to hit the high points of the mirror frame with paint to give it a little pop.
Seal the entire frame (optional).
If you’re feeling especially froggy, you can then seal the entire frame with a coat of clear wax. This wax layer ensures that all the layers of paint set and are covered.
The final wax coat is entirely optional and up to you! At this point, I just wanted to get the finished piece back in place. Also, get the mirror back in the frame before a kid or cat knocked it over!

Clean the mirror.
Now that your mirror is done, remove any painters tape and cardboard. If you got paint on the mirror, no worries! A great way to remove any paint is to use a flat razor blade like this one to scrap any excess. Luckily you aren’t likely to scratch the mirror since it’s flat to the surface when it scrapes.
As a final step, you’ll want to clean the mirror. Use window cleaner (or vinegar and water) and a clean rag to make the mirror shine. Here’s the new look using my favorite mirror painting ideas:

Overall, painting an old plain mirror frame can breathe new life into a room at a great price. This method not only works for a mirror makeover, but an old picture frame as well. Don’t forget to hit up your local thrift stores or flea markets to find mirrors and frames to work on. They’re chalk full of small mirrors that are cheap. You can really stretch your creative chops by adding embelishments, glass paint, or anything you can think of!
Interested in learning how to chalk paint dressers and other furniture? Learn how I updated an old dresser with chalk paint and new drawer pulls here!
Love farmhouse decor but don’t want to spend a ton? Check out where to find farmhouse decor for cheap.
Now that you know how to paint a metal, wooden or plastic mirror frame, which mirror painting ideas do you plan to try out? Leave a note in the comments below!